Make game-changing hummus with this easy technique
Silky smooth homemade hummus is easier to achieve than you think. Nail this method, and you’ll never look at a chickpea dip the same way again.
This simple Middle Eastern dip is so universally loved that the ‘Hummus Wars’ have rumbled on for years now, with both Lebanon and Israel claiming they invented it. Meanwhile, here in the UK, our fridges groan with tubs it for dipping, dolloping and spreading.
While there are some fabulous shop-bought versions available, I urge you to have a go at making your own – I promise you’ll never look back. My hummus recipe is really easy and utterly delicious.
There are lots of variations when it comes to recipes for hummus, but essentially it’s chickpeas, tahini, lemon, garlic and salt. Texture is important too – generally, the holy grail is considered to be super smooth and silky. But the techniques for achieving that can get people really worked up (try individually peeling every chickpea in a tin and you’ll understand why).
There’s so much information out there on making the perfect hummus that things can get a little confusing, so let’s break it down.
Dried vs tinned chickpeas (and how to cook them)
In the battle of the chickpeas, when it comes to superior taste and consistency, dried chickpeas generally triumph. But they do need soaking and take far longer to cook. Lots of us don’t have the luxury of time – so I’m a big fan of tinned.
The key with both types is that, to get that silky texture, they need to be super soft before you blend them. With dried chickpeas, this could involve cooking them for hours, but with tinned it should only take about 20 minutes.
A top tip is to add bicarbonate of soda to the water while simmering the chickpeas (whether dried or tinned), as it helps break down the starches and accelerates the softening process. (The ratio should be around half a teaspoon of bicarb per tin of chickpeas.) It also helps the skins to come off – but more on that later.
Soaking dried chickpeas before you cook them is essential, and you can also add the bicarb (and a little salt) to the soaking water. I like to leave them to soak overnight to allow them to expand and soften – just don’t forget to change the water before cooking. Foam may appear on the surface of the water when you’re cooking dried chickpeas. All normal, just skim it off and carry on cooking.
Tinned or dried, you’ll know they’re done when you can squish them easily between your fingers. At this point, drain the chickpeas but save the cooking water as you’re going to want to use a little of it later on.
On the subject of skins
Most people agree that you can take your hummus to the next level by getting rid of at least some of the skins, but this can be time consuming. Plus, I feel that if your blender is powerful enough and you’ve cooked them as I’ve described, the skins will get well blitzed, so there’s no real need to bother.
That said, if you do want to try taking off the skins, then rather than going through each chickpea one by one, just shake the pan of cooked chickpeas and use a spoon to remove the skins as they rise to the surface of the water. Alternatively, once you’ve drained them, you can spread them between two tea towels and gently rub them to coax the skins off. I’m not sure I have time in my life for this but if you want to, fill your boots.
The other core ingredients
Tahini
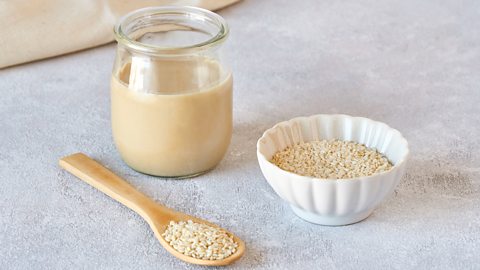
Tahini is essentially sesame seeds which have been ground into a thick paste. The versatility and super nutty flavour of tahini means it’s a key ingredient in Middle Eastern cuisine – and it’s really nutritious too!
When it comes to using tahini in your hummus there are two things to remember. The first is that you should go for the best possible quality, and look for the lighter varieties that use hulled sesame seeds. The darker ones with the hull intact may have a bitter flavour and won’t give you the desired results.
The second piece of tahini-related advice is to ensure you’re using enough of it – this is essential. At least a third of the total weight of your hummus should be tahini. So, for a 400g tin of chickpeas, you want to make sure you have at least 150-200g tahini. Any less and the flavour just won’t be there.
You can then either add the tahini directly to the chickpeas in the blender or you can mix it with the garlic and lemon to make a tahini sauce, and pour that in. This is useful as you can use the leftover sauce for other dishes throughout the week.
Tahini can often react when you add a liquid like lemon juice, seizing up into a thick paste. Don’t worry – just gradually add water and it will return to its original creamy texture.
Garlic
Some recipes will suggest you add the raw garlic straight to the blender, but I find this gives an overpowering heat to the hummus.
I prefer to pop the garlic cloves into the cooking water while the chickpeas are simmering. This will mellow out the flavour and give a lovely garlicky warmth. Alternatively, you can crush the cloves and steep them in the lemon juice for a few minutes before adding the lot to the chickpeas.
Blending
If you’ve made hummus before, you may have experienced the chickpeas clagging up and sticking to the side of the machine when you blend them. The trick is to make sure you blend the chickpeas while they are still warm, so the starches don’t have a chance to firm up.
A word of warning – to avoid a chickpea explosion, you need a blender that will allow the steam to escape. A food processor or open-top blender will work better than a closed top blender.
Some people recommend adding ice cubes when blending as they claim they actively aerate the hummus as they blend. I haven’t found this to be necessary – but feel free to give it a go!
A common misconception is that you need to add lots of olive oil while blending the hummus to get the right consistency – please don’t! The fat in the tahini is enough to create the right homogenised texture. It’s better to just drizzle olive oil over the top to serve. If the hummus is too thick when blending, add a little of your chickpea cooking water which will loosen it up. Just drizzle in a very small amount at a time as you blend to get the desired consistency.
Toppings
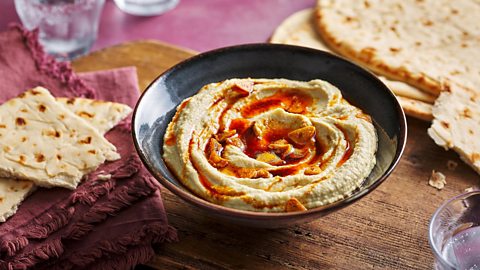
Once you’ve nailed your basic hummus recipe, you can get creative with the toppings. I love to lightly toast some pine nuts and sprinkle them over with a nice drizzle of olive oil.
To make your hummus into a more substantial dish, you could top it with grilled or minced lamb, which is an amazing and really classic combination.
You can serve it with warm flatbreads, crudités, sweet potato chips, pitta bread or pitta chips – that’s the beauty of it, it’s so versatile!
Once you’re confident, you can even start to play around with the flavour of your hummus, adding cumin or pumpkin, perhaps, and topping it with coriander or chilli oil, to add a little heat.
Plus, if there’s any hummus leftover (highly unlikely), you can even freeze it for the next time you have friends over.
Originally published April 2023