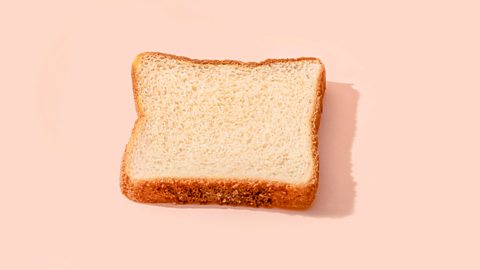
The easiest way to make a simple white loaf
By Edd Kimber
Think making bread is time consuming and complicated? Here’s how to whip up a classic white loaf with minimal effort and maximum satisfaction.
The humble loaf is one of our oldest recipes, dating right back to Neolithic times. It’s really quite magical that something so divine can be created by four simple ingredients: flour, water, yeast and salt.
Let’s delve in and find out what happens when these ingredients come together with heat, and how we can learn from the science to make our bread the best it can possibly be. I’ll break down my basic (but beautiful) white bread recipe, step by step, so we can understand each part of the process.
Step one: flour and… butter?
Butter isn’t an essential ingredient for bread but I love the way it enriches the dough, giving it a softer crumb. It also helps the bread from going stale for a day or two longer. Make sure your butter is at room temperature so it can combine easily with the flour. Use your fingertips to bring it together until it resembles fine breadcrumbs.
The science: Choose strong bread flour over other types. It naturally contains proteins like glutenins and gliadins – which you might know better as gluten. Creating strong gluten networks is essential for getting a perfectly risen crusty loaf. Plain flour contains less protein, making it good for light cakes and soft flatbreads but not sturdy enough to support the structure of a loaf.
Step two: yeast, salt and kneading
Yeast can be fresh or dried – there will be no perceivable difference in the result. Instant yeast, also called fast-action or easy bake yeast, doesn’t need dissolving in water before being added to the dough (most dried yeast available to buy is instant).
Fresh yeast is more delicate and prone to going off, though it can be stored in the freezer for longer. You’ll need to either dissolve it in lukewarm water or crumble it straight into the dough. The kneading will distribute it evenly.
You may have heard warnings about not letting your salt touch the yeast, with claims that it will ‘kill’ the yeast. While it’s true that salt slightly slows down the fermentation process (which is actually a good thing, as a longer, slower fermentation helps improve the flavour), the two ingredients would have to be in contact for hours before any damage was done. Plus, dried yeast is coated in starch to protect it.
Follow Edd Kimber's guide to making a simple white loaf
If you’re working by hand, tip the dough out onto the work surface and turn, fold and stretch for 15–20 minutes. The dough may feel sticky at this stage but don’t be tempted to add more flour as this can make your bread tough and chewy. Just use a dough scraper to help bring it together and to pick up the bits that stick to the surface.
If the dough feels overly sticky or difficult to handle, try using the slap and fold method, which literally involves slapping the dough down on the surface and folding it. This is an efficient way of kneading doughs with extra moisture.
To make kneading easier, you can use the dough hook attachment on a stand mixer. Put it on a medium-low speed for 10–15 minutes.
Either way, work the dough until it’s is smooth and elastic and no longer sticks to the surface (or the side of the bowl, if you’re using a mixer). A well-kneaded dough should form a pliable ball that is springy when pressed.
It is possible to over-knead, which can cause the gluten to rip and also lead to dense, dry bread. This is very hard to do when kneading by hand, though.
If you’re not sure whether your dough is ready, take a small piece of it and hold it between your thumb and forefingers and gently stretch it apart. If you can stretch the dough out thin enough to let light through, it means the gluten has developed and is ready for a rest. But if it breaks, keep kneading.
The science: At this stage, the proteins in the flour react with the water to create gluten networks. The process of kneading the dough stretches the gluten into elastic sheets, which will capture the carbon dioxide created by the yeast, forming little bubbles and ultimately resulting in a spongy loaf. The salt not only adds flavour but also strengthens those gluten networks, helping them to contain the carbon dioxide.
The starch in the flour absorbs the water and is digested by enzymes, which turns it into sugars. This sugar feeds the yeast, giving it something of a turbo boost, encouraging it to produce more carbon dioxide and alcohol. This is the fermentation process.
It’s the alcohol which gives bread the aroma and taste that we all know and love, so generally speaking the slower a loaf is fermented, the more flavoursome it will be.
Step three: proving
Shape the dough into a ball, put it in a clean, oiled bowl (the oil will stop the dough sticking and tearing when you take it out) and cover. I like to use shower caps for this – I stash them away every time I see them in hotels – as they can be used multiple times and the elastic means they fit most bowls. A carrier bag or damp tea towel will also do the job.
It’ll take roughly an hour to prove the dough, although the time will depend on the temperature of the room – it can take significantly longer in a cool room while it’ll likely need less time in a very warm room. A good tip is to look for the bubbles on the side of the bowl, showing the dough has fermented and is rising.
The science: This first rise allows the carbon dioxide to expand, hence why the dough –seemingly magically – doubles in size. The bubbles of carbon dioxide are held together by the gluten structure that we created through kneading the dough. These are further developed during this fermentation process, making millions of thin sheets to hold those bubbles in place for a lovely light loaf.
Step four: shaping
Tip the dough out and shape it into the form you want to achieve. You can choose to use a loaf tin, create a free-form ‘boule’ (a round cob), or ball it into several rolls.
Edd Kimber explains how to create soft and fluffy rolls
The science: Don’t feel like you need to be gentle when shaping the dough – by handling it, you’re also knocking it back, getting rid of the larger air bubbles that have formed during the first prove. This process is important as it gives your loaf a uniform texture.
Don’t be tempted to add more flour at this stage either. The dough could absorb it, resulting in a heavier, denser loaf.
Step five: the final prove
This final prove – or second rise – should, again, take about an hour. Some people choose to put their shaped bread in the fridge to slow down the rise and create even more flavour. Either way, cover it with your shower cap or a damp tea towel again to prevent it drying out.
Knowing when the dough is ready to bake can be tricky, but a good indicator is the ‘poke’ test. Lightly press a floured finger to the dough, making an indent. If the indent springs back quickly and completely, the dough still needs to rise a little longer. If it holds its shape without springing back, then the dough is overproved and needs baking immediately before it starts to collapse. If the indent springs back slowly and doesn’t fill in completely, then congrats! You have a properly proved loaf that is ready to bake.
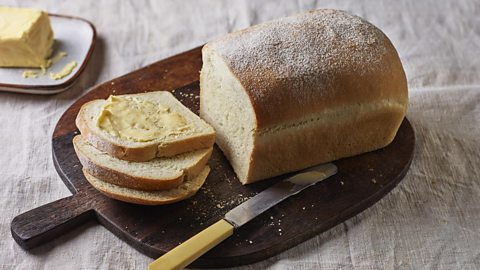
Basic white bread
Use this simple white bread recipe to make a loaf, free form boule or individual bread rolls
For bread rolls, if you prefer a crustier finish, give each plenty of space on the tray during the second prove so that they bake individually and will be exposed to the heat of the oven all the way around. For softer-sided, tear-apart rolls, place them a little closer together so their sides are all touching by the end of the prove.
The science: Most of the changes will have taken place during the first rise, but the air bubbles created prevented the yeast from working. Knocking those air pockets out reunited it with its food supply, so the second prove allows the yeast time to get back to work and finish its job of creating flavour, developing texture and ensuring the loaf has an even crumb.
Step six: finishing and baking
I like to score my free-form boule with a sharp knife in the style of a noughts and crosses grid. Scoring helps to control the shape of the loaf as it rises and expands in the oven. You don't need to do this if you're using a tin or making small rolls, though.
Dusting with flour will give a rustic finish, while an egg wash will give you shine and create a softer crust – it also acts as an adhesive if you want to add some seeds.
As you put the bread into bake, pop a baking tray with a couple of ice cubes into the oven too – ideally on the shelf below. During the early stage of the bake, the bread rises rapidly as the carbon dioxide expands – this is known as the ‘oven spring.’ Adding ice creates steam which keeps the surface of the bread moist, preventing the crust forming too soon, so the bread will expand and rise to its full potential.
The bread is ready when it’s a deep brown colour, and it should sound hollow when you tap the base.
If you’ve made soft baked rolls, brush them with melted butter while they’re still warm and sprinkle with flaked salt.
Enjoy with lashings of butter – you’ll never go back to shop bought again!
The science: During baking, the alcohol (created during the fermentation process) begins to evaporate when the bread is exposed to heat, transforming into gas bubbles which fill holes in the gluten network and cause the dough to rise.
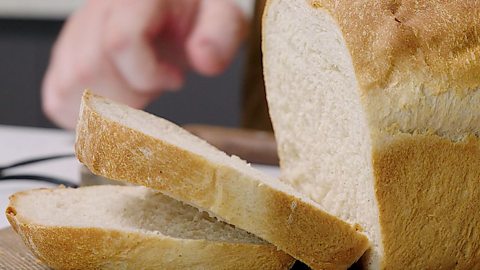
Once the crust has formed and the gluten networks have set, the gas pressure in the holes builds to the point where they pop and create the open structure you can see when you slice your loaf.
Be patient and wait until the bread is cooled before slicing. Otherwise, it will lose its shape as you slice and taste gummy.
Originally published February 2023