The cheat’s guide to making your own puff pastry
There is an easy way to bake gloriously puffy, flaky pastry with minimal effort – and we're about to show you how.
True puff pastry is one kitchen challenge that sends people (even chefs) running for the freezer or chiller aisle in the supermarket. And truth be told, puff pastry proper is rather technical and time consuming. But what if you could create beautifully buttery, flaky homemade pastry from three or four basic ingredients, in about 30 minutes of hands-on time?
Enter rough puff pastry – AKA the chef’s cheat puff pastry. It’s still gloriously puffy, deliciously flaky and super buttery, but it’s a lot easier and more forgiving.
How to make it
Claire Thomson whips up a portion of rough puff pastry, showing that it's simpler than you might think
In any sort of puff pastry there’s no baking powder and no yeast. So, how does it miraculously puff up to such great heights? It’s all thanks to steam. In the oven, the moisture in the dough creates pockets of steam which puff up in layers between pockets of fat. Meanwhile, the fat is melting into those layers and crisping them up. Every layer traps steam which expands and rises, so the more layers you have, the puffier the pastry will be. It is captivating to spy through the glass of the oven door and watch the meteoric rise of your puff pastry.
So how do you create those pockets of steam? It sounds complex when you explain it, but the method is very simple and relies on a couple of basic rules.
Keep everything cold
It’s important the pastry stays cold all the way through the process, so the butter only melts once it’s in the hot oven, not before.
Start with very cold butter – as in freezing cold. You can even cut it up into small pieces and pop them in the freezer for 10 minutes before using it. If the butter starts to melt, it will make a stickier, soggier and greasier pastry. We also need it to stay in visible chunks throughout the process to make those pockets. If it is rubbed in too finely, it won’t puff up as well.
Some recipes call for half butter and half lard. Lard will make rough puff a little flakier as it has a lower water content than butter, and also a higher melting point. It is very easy to work with, softening enough to cut into the dough very quickly. In my opinion, butter gives the best flavour, but feel free to experiment.
Work it and rest it
In any sort of baking we can’t go without mentioning gluten, and for rough puff we need to develop some. Handling shortcrust pastry too much or adding too much water creates unwanted gluten that can lead to tough pastry. However, in puff pastry, we do need to create enough gluten in the dough so that the pockets we create are strong enough to trap steam, and stretchy enough to rise and puff. If this sounds daunting (I mean, how do you do that?), don’t worry. All will be explained.
There is a lot more water in rough puff pastry than in shortcrust. As a rule, it has about half the amount of water as flour. This wet dough is what will create the steam and the gluten. The process of rolling and folding (more on that later) will develop just enough gluten. All you have to do is follow the recipe and keep your cool.
As you make the pastry, the temperature of the butter will creep up a little, so adding ice cold water is a great way to bring it down again. I like to add a little lemon juice at this stage too, as the acid helps the gluten to relax.
Add the water gradually and just mix enough so it’s holding together. It will look scraggy and rough – as the name suggests – and this is exactly how you want it. Scraggy is good!
Pop your scruffy ball of dough in the fridge for about half an hour, to let that gluten you’ve just created relax and keep the fat as cold as possible.
The dough needs to be relaxed to stretch round the pockets of butter. So while rough puff pastry only requires a couple of fairly quick bouts of mixing or rolling, it does require a little planning ahead.
Roll it and fold it (and chill it – again)
The next process of rolling and folding is going to stack all those pockets on top of each other so your pastry puffs up in layers. Roll the pastry out into a rectangle, then fold the shorter sides in, one over the other, like a letter about to go into an envelope. Then turn it, re-roll and fold again. Each time you do this, the butter chunks are flattened out into larger sheets and layered on top of each other.
In proper puff pastry this is done in a regimented fashion, with end to end even layers. In rough puff, the pockets are higgledy-piggledy.
Be firm when you’re rolling puff pastry, but don’t go back and forth too much – this warms things up with friction. We want the butter and the dough to stay intact, not tear or blend together. Each time you roll, you’re also working the gluten just enough to build its stretchiness.
This roll-fold-chill stage is repeated a couple of times, with these two golden rules front and centre: keep it cold, keep resting. (Are you detecting a theme here?)
Related stories:
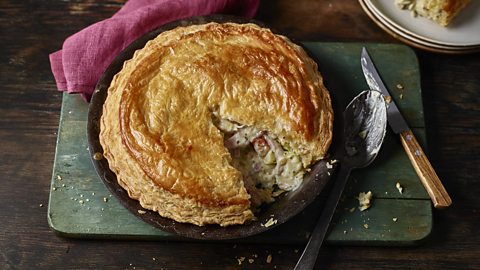
Leftovers pie
With this recipe you can turn your leftovers into a brand new dish
How to prep and cook with it
That’s the hard work done, and it wasn’t even that hard. Now, give the pastry a bash with a rolling pin to flatten it out a bit before rolling. This will keep it in an even shape and make it easier to roll. Roll out the pastry to about the thickness of a ten pence coin and it’s ready to use.
This rough puff pastry is ideal for sausage rolls, fruit tarts and pasties, but it’s also brilliant for a luxurious pie. The really dedicated pie-lover might make a shortcrust pastry for the base of a pie and rough puff for the top – but I think life is too short for two types of pastry and the rough puff works perfectly well on the base.
Use a beaten egg to stick it together and to give it a golden sheen. Don’t forget to slash the top of the pastry with a sharp knife to allow some of the steam to escape.
Whatever you decide to fill your pie with, make sure the filling is cold. You’ve kept all that fat in its pockets so far, but a hot filling will cause it to start melting, destroying your hard work. You can always fill your pasties, rolls or pies and give them a final chill before baking – keep them covered in the fridge for up to 12 hours.
These sausage rolls are easy to make
Once the pastry hits the hot oven, the magic begins. A tray or pie dish that conducts heat well (dark metal, preferably) is going to help you avoid the dreaded soggy bottom.
How to freeze it
If all this sounds like a marathon investment of time, remember that rough puff pastry freezes really well. You can always make a big batch and keep what you don’t need in the freezer – it’s such a quick and easy way to rustle up some impressive snacks for unexpected guests, or it can turn leftovers into a pie or a batch of pasties.
Freeze it in a reusable plastic bag or box and it’ll keep for up to six months. Then defrost it in the fridge overnight before using.
Originally published February 2023